
7 things to double-check before launching your website
You’ve perfected your copy, picked the best photos, got your services ready to launch and you’re about to hit publish. PAUSE!
After launching over 100+ websites, I have learned (sometimes the hard way!) the ins and outs of the launching process. I have created a double checklist for myself that I go through every single time before I launch a site - and I’m sharing it with you!
Here’s a list of a few very important things I ALWAYS CHECK before I hit that pretty publish button:
1. Contact + newsletter forms have emails and lists connected
These are all big deals - but this is FOR SURE a big deal! If your contact form / newsletter form isn’t connected you won’t be able to get inquiries or signups (and we definitely don’t want that!).
How to check your contact form is connected to your email:
Edit the page your contact form is on
Double-click into the contact form
Go to the “Storage” tab in the form pop-up
There are 4 ways to connect your contact form: Email (which is most normal and the way I suggest!), Mailchimp, Zapier or Google Drive. If it’s a true contact form I would make the messages go to your email! You don’t wanna miss them!
To connect a new or different email, click the “x” on the right, type in an email address and click “connect”.

To double check your newsletter form:
Edit the page/section your newsletter form is on (PS if you have it multiple places across your website you need to do this separately for EACH form).
Double-click into the newsletter form
Go to the “Storage” tab in the form pop-up
There are 4 ways to connect your newsletter sign up through this form:
Squarespace Campaigns
Mailchimp
Zapier
Google Drive
NOTE: You can connect a different type of form (like Flodesk, Constant Contact, etc) by adding a CODE BLOCK instead of the Newsletter Block. You will just copy and paste in the embed code they give you!
Interested in learning more about setting up a welcome email? Check out this blog post!

2. Page URLs are correct
If you’re thinking “cool Chelsea… what’s a URL?” don’t worry, I got you! It’s the address you type into a web browser that goes to your website! And when you go to different pages on your website it adds a backslash like /home or /about or /blog.
We want to make sure your URLs are all “clean” and don’t have “-1” or “new-page” in them. This will help when people search for you and your SEO.

BUT this doesn’t just happen without you putting in the correct name for your page!
For instance, if you’re re-designing your website and had an old page named “HOME” that you put under your not linked and created a new “HOME” page under your primary navigation, it will say “home” in your navigation BUT it will add a “-1” to the url reading /home-1.
That is what we don’t want and here’s how to check / fix it!
In the gray panel on the left side when you’re signed into your website go to “PAGES”
On each page you’re using on your website (whether it’s in your main navigation or secondary navigation) hover over the page and click the settings wheel next to it.
In the settings pop-up under “General”, you will see there are 3 names: Page Title, Navigation Title, URL slug.
The Page Title is what will show at the top of the tab as the page name.
The Navigation Title will be what's in the navigation.
Then the URL slug is what the /PAGE NAME will be. If you see a “-1,2,3….” after it, it means you have ANOTHER page slugged with that name and you will have to go and find it and change it. I usually just add the word “old” to the other one so I can change the one I want. You must change the old one first before you can re-name the new one.

3. SEO completed on all pages
Search Engine Optimization (SEO) is all the rage - and for a great reason. This is how people are going to find you on the internets! We want to make sure there are plenty of keywords and phrases embedded in your site so your dream clients will find you. There are 3 main things you can do in Squarespace for your SEO - write your main website description, write descriptions per page (this is what you see under each page description in Google) and add keyword tags on images. For all of these you want to make sure you are using keywords and phrases that people actually use to search for your service / business! You may also want to follow an SEO checklist here.

How to add your website’s SEO site description:
In the gray panel on the left hand side when you’re signed into your website go to MARKETING > SEO.
Scroll down and write your site description!
Here you can also change your SEO Title Format (for instance if you want to add your location for search engines or “wedding photography”, etc) and how your title appears on individual pages and items.
How to add SEO descriptions to each page:
Go to PAGES in the gray panel
Hover over each page and click the settings wheel
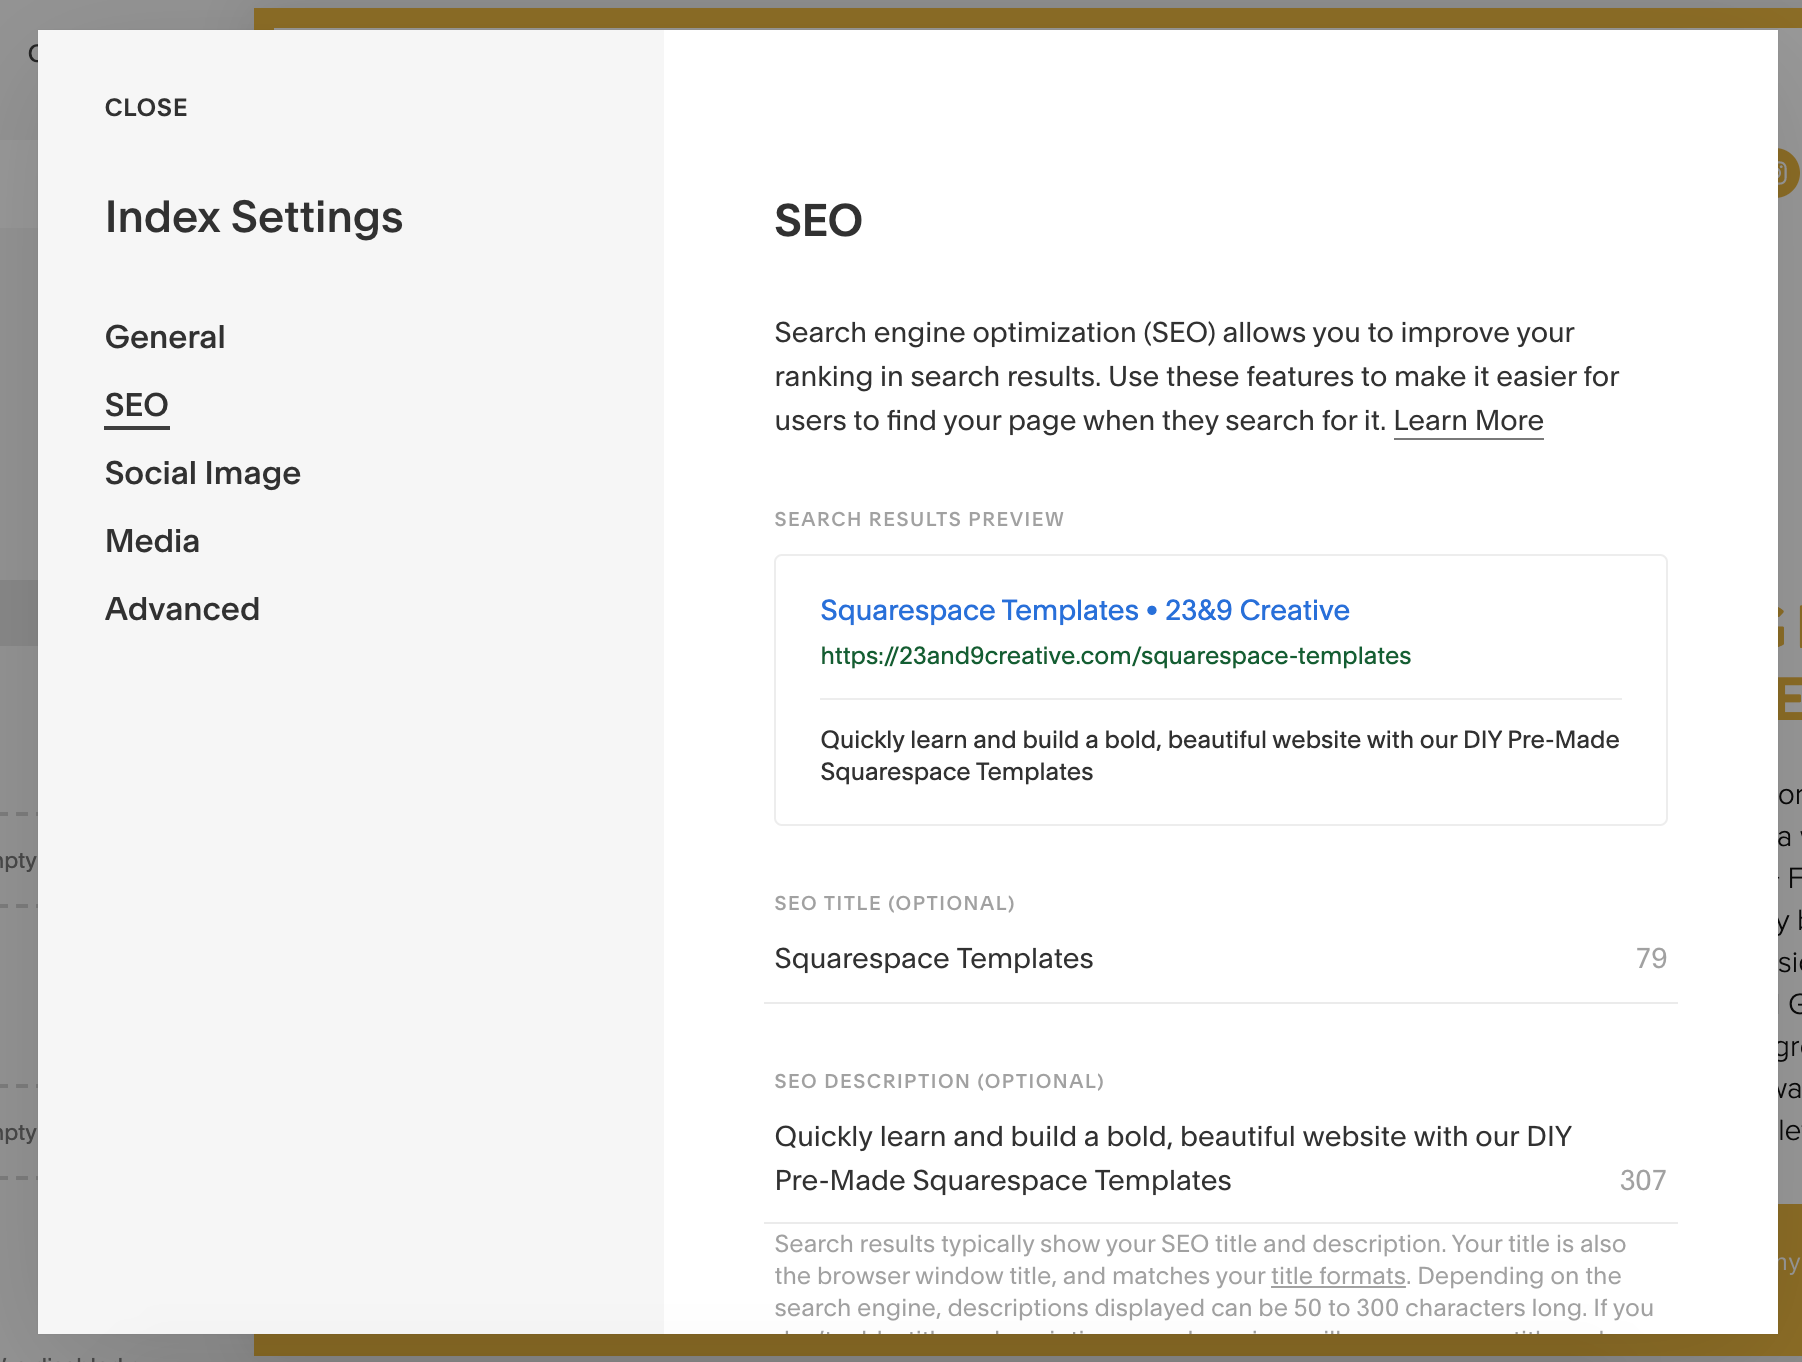
In the pop form choose “SEO”
You can create a SEO title for each page and a description.

4. SEO tags on images
Similar to the pages, we want to put keywords on all your images as well! The more SEO the better. To add a filename to your images:
Double-click into each image
Change the “Filename” to keywords about what’s on that page / section

5. Image sizes are small
We want to try and keep our images as small as possible (but still a great resolution!) to keep your website load speed down and for your pages to load as quickly as possible! If you’re having trouble with big photos try running your photos through a compressor such as TinyPNG. They bring down the size while keeping the resolution great!
6. Custom Not Found / 404 Page
This isn’t a must, but it’s a great addition! When someone goes to your website with a broken or wrong link, by default they see a “Not Found / 404 Page” that looks like this:

But, great news! You can make your own that matches your style and guide people to the page you want them to go to!
To create your own 404 Page:
In the gray panel on the left hand side of your site when you’re logged in, go to PAGES
Click the “+” page under NOT LINKED
Call it “404 PAGE” (or something else - but just remember what it’s called!) NOTE: The 404 Page cannot be an index page, it must be a single page.
Create / design your page
Go out of PAGES back to the main panel and choose DESIGN > NOT FOUND / 404 PAGE
Choose the new page you just created in the dropdown menu
BOOM! You now have a custom 404 page! Go you!

7. Cookie banner enabled
You may heard a few things about “GDPR” or “COOKIES” in the past few years. Let’s look at what that really means.
GDPR: The General Data Protection Regulation is a European Union privacy law that went into effect on May 25, 2018.
Here’s an article from Squarespace about who this affects and needs to enable their cookie banner.
Here’s how to turn it on:
In the gray panel on the left side of your site when you’re signed in, go to SETTINGS > COOKIE & VISITOR DATA
Here you can “enable” the banner, write your own confirmation text, choose if it’s a bar or pop-up, and then choose what to do with your Squarespace Analytics after reading the above article depending on your website type.
NOTE: You can still connect Google Analytics no problem! You will also still be able to get pretty accurate analytics in your "Analytics" tab (although not 100%). If someone says "no" or does not comply to your Cookies then you will not receive their specific analytics data. I still get plenty of data on my site personally to be able to get a good snapshot of what is happening.
