How to add "related posts" at the end of your Squarespace blog post
For a long time I didn’t understand exactly why I would want to show “related posts” at the end of my blogs. I saw it on other blogs and I would always scroll through it (and click on another post), but I didn’t know how well it could serve me!
Having a “related posts” section at the end of each blog gives your reader a super simple way to click into more of your content that they are interested in! It adds value not only for your reader - but for you as well! It is always great to find an opportunity to get more of your awesome content in front of readers (and let’s convert them to a subscriber while we’re at it!).
Now that I’ve convinced you that you need this - let me show you how easy it is! All you need is an extra few seconds on creating each blog post. Here’s a quick video overview of what you’re going to learn!
easy steps to adding a related posts block
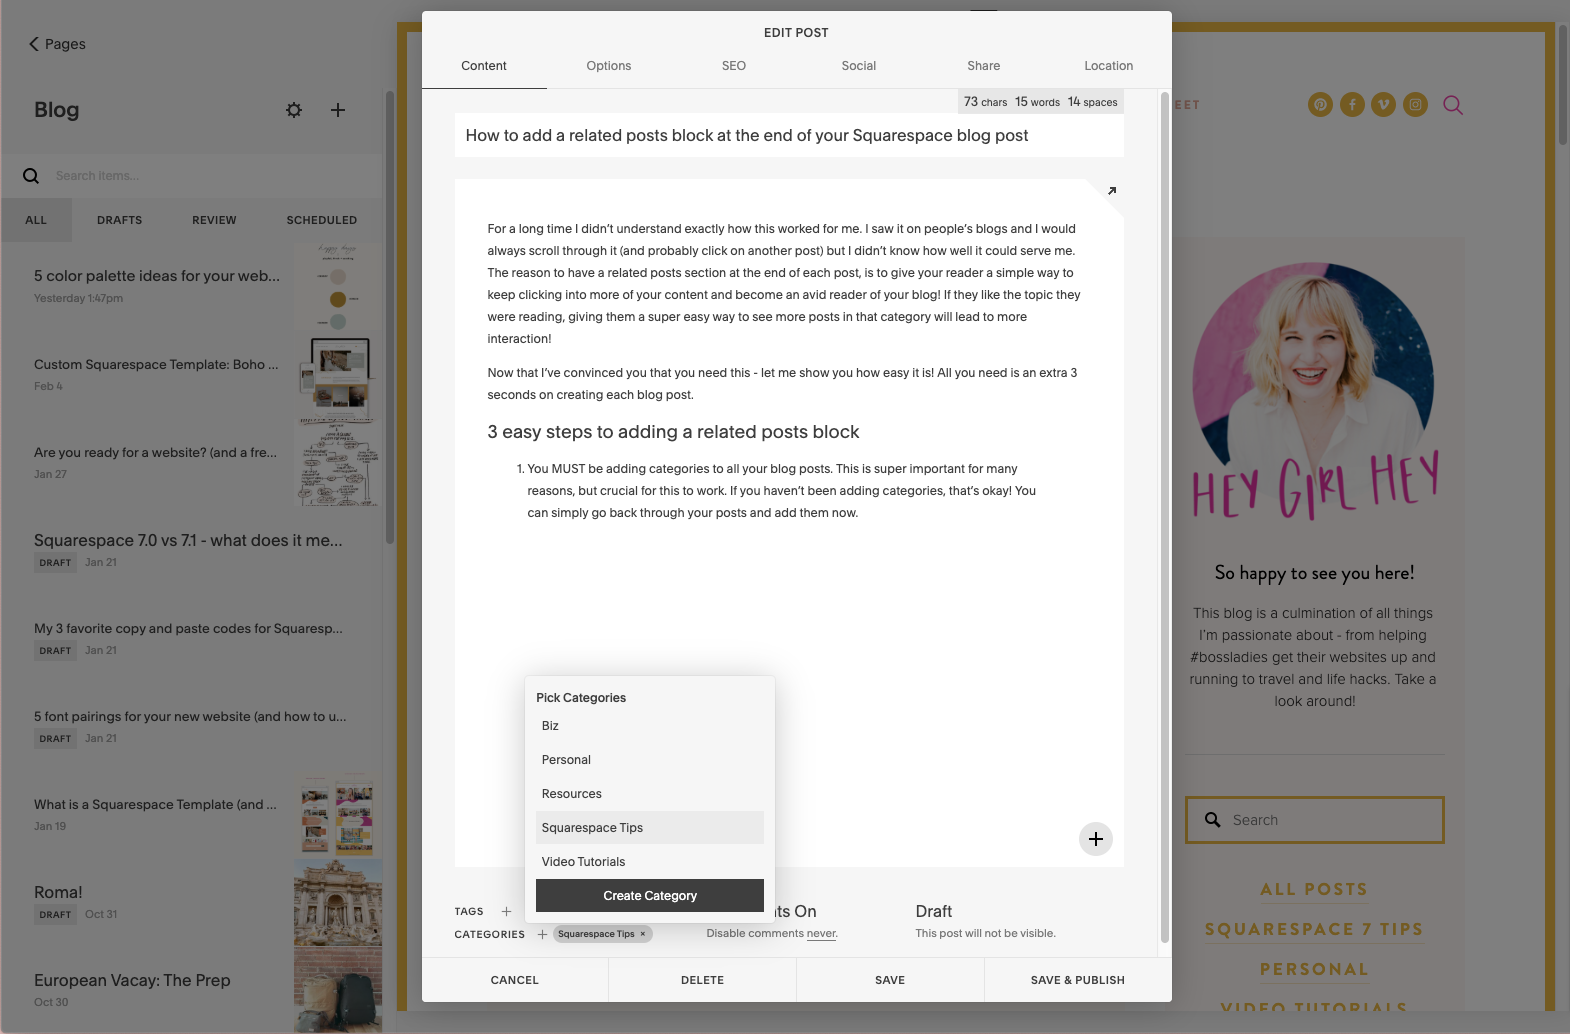
You must add a category to your blog posts.
This is super important for many reasons, but crucial for this to work. If you haven’t been adding categories, that’s okay! You can simply go back through your posts and add them now. When you’re creating/editing your post in the lower left hand corner click the “+” next to CATEGORIES and either create a new category or pick a previously created category for your post.
TIP: You can rename categories if you need to! Click on the Settings Wheel next to your Blog Page and go to Advanced > Manage Categories. Just click on each to edit and you can rename!
At the end of each blog post add a Summary Block.
Click the gray sideways teardrop to add a new block and under “SUMMMARY” choose “CAROUSEL”. You can also add a “LINE” block above it to separate it from your blog post and a “TEXT” block under the line where you can type in “related posts” or “browse related posts”.
How to edit the Summary Block.
1. Double click the new Carousel Summary Block and under the first tab “CONTENT” choose the blog that you want the posts to come from.

2. Under the Layout tab, I would remove the Header Text that says “Featured”. Then you can choose the size of the photos (my blog post images are always vertical so I use the 3:4 ratio), how many blogs in the row, your text size and alignment and the position of your Metadata (Metadata refers to your category or date). I usually choose 3 items per row, Medium text size, Center Alignment and Above Title as my Metadata position.

3. Under the Display tab you can choose how many posts you want to show, the elements you want to show and then what Metadata you want to show (if any). I show 6 or 9 (since there are 3 per row to keep it even) Title, Thumbnail and choose Category as my Primary Metadata and none as my Secondary Metadata.

4. THE MOST IMPORTANT PART (DON’T MISS THIS). Under CATEGORY FILTER type in the category you want to appear at the end of that specific post! You can also add tags, but keeping a broader category will give your reader more to look at.

And that’s it! You now have a related posts section at the end of your post that will give your reader so much more of your amazing content to dive into!
This may seem like a few steps, but once you establish your first one and know what to choose, it takes a total of 3 seconds to add on each post.